In the last part of this series, we saw what I had set up for self-hosted applications. Now let me show how I got all these on the internet. For this, the last section is a good background.
Let us look at some of the hurdles I had. I have two ISPs, and neither of them provides a static IP. Moreover, one of the ISPs does not even assign a public IP, placing me behind a CGNAT . Managing dynamic DNS records can be a pain. Load balancing them can be a tedious process as well. Forwarding ports can turn out to be a security issue depending on how effectively I implement firewall solutions behind it. All of these added up result in a problem for my network. Another thing to note that I had already moved my domain registrar to Cloudflare owing to its better management UI and fast DNS resolvers. I was impressed by how quickly the DNS changes propagated, making testing things out a smooth experience.
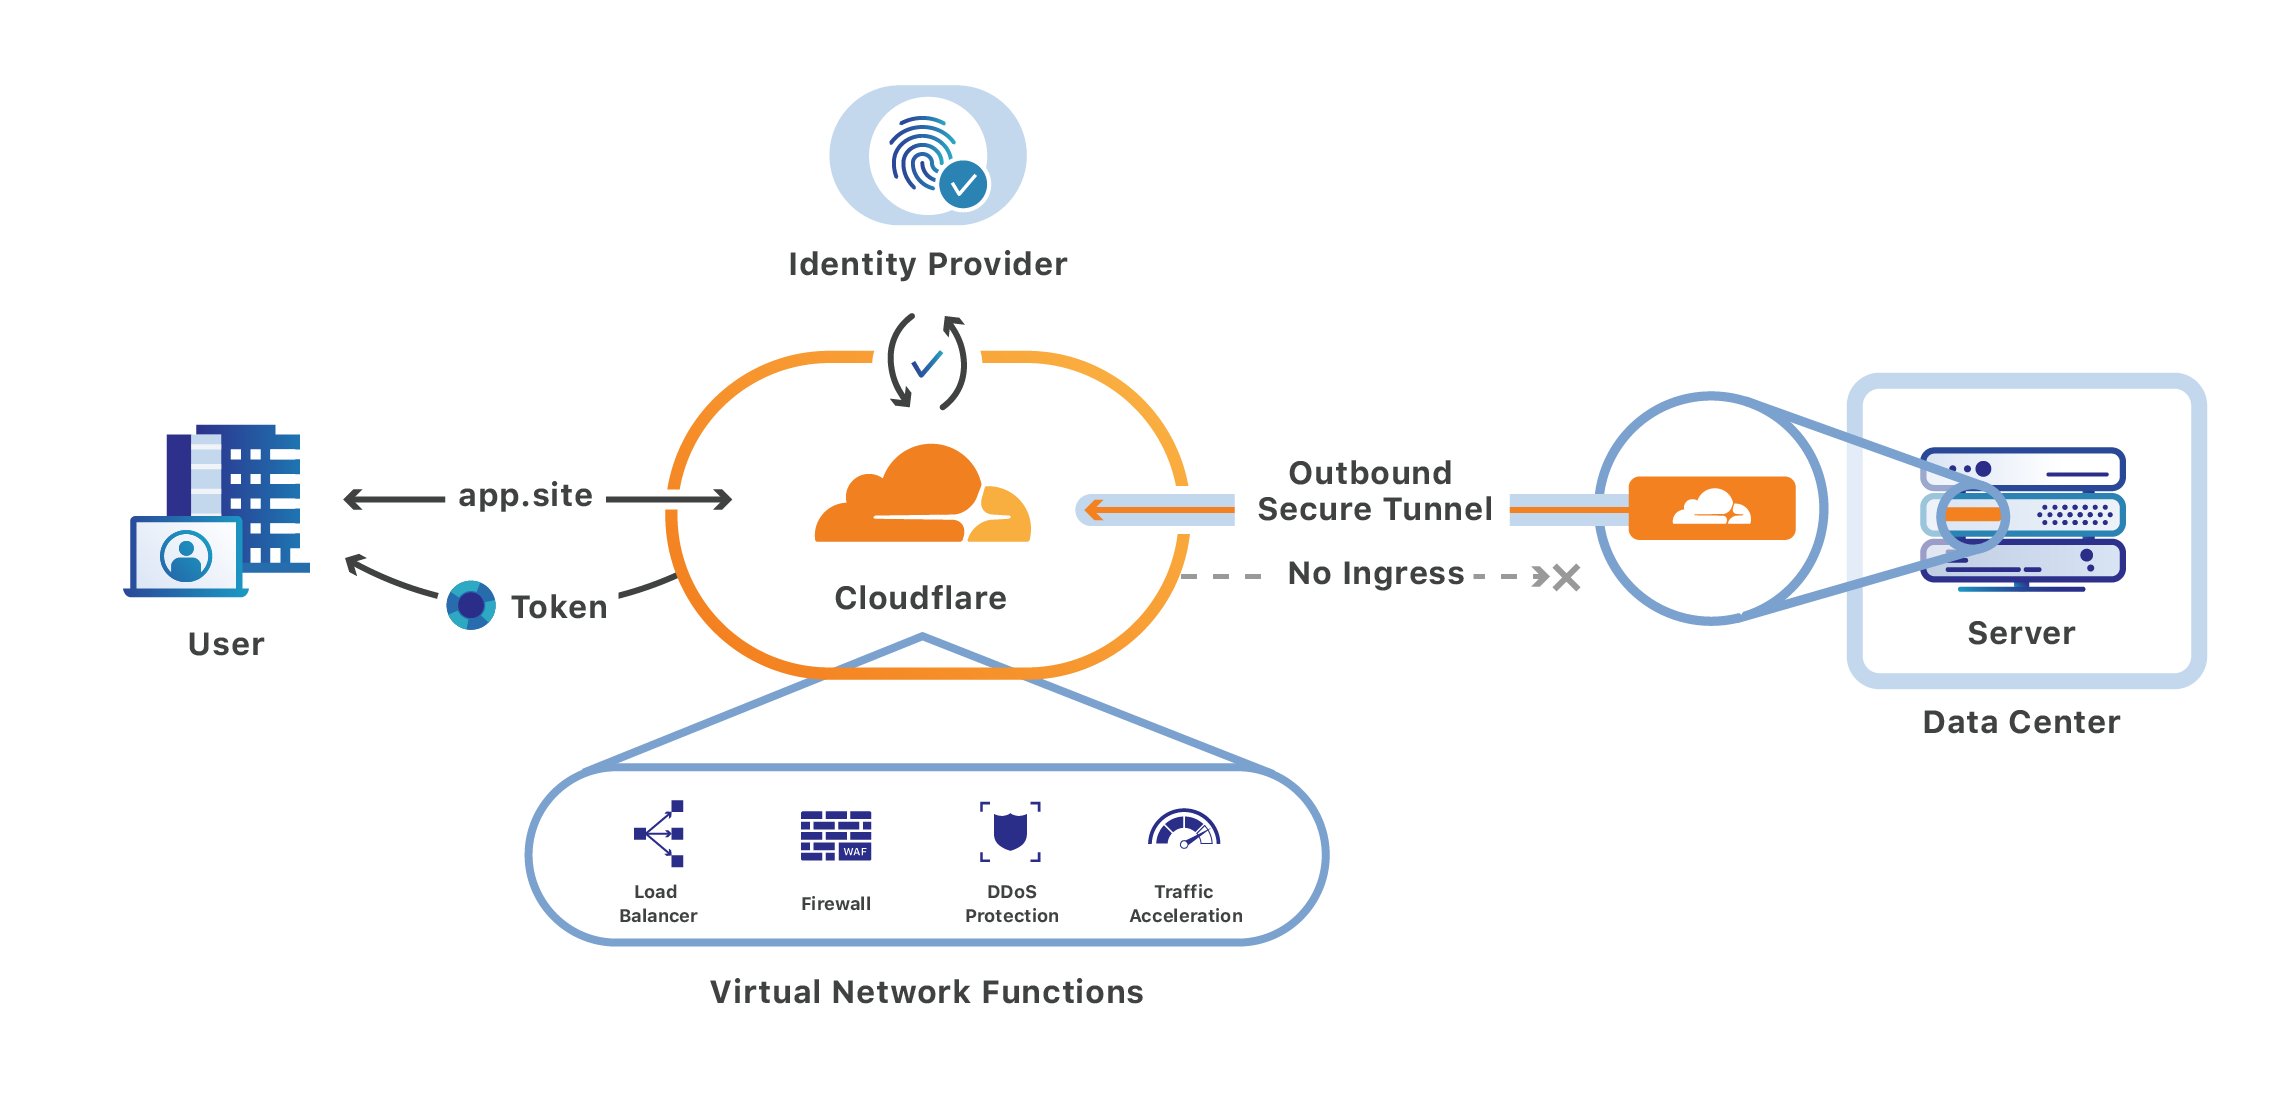
Enter Cloudflare, beginning with Argo Tunnel . Argo tunnel protects the origin server by creating an outbound tunnel out to Cloudflare edge data centers (I have seen it make four connections to nearby locations). There are no inbound ports to be opened. All I have to do is to run a lightweight daemon that makes an outbound connection. Once that is done, I point my DNS CNAMEs to the Cloudflare tunnel subdomain I get from the daemon. The tunnel can not only handle HTTP/S traffic but any TCP/UDP traffic like SSH and RDP. Here is good documentation from Cloudflare on how to set it up.

More info here
You can have one tunnel per subdomain/service, in which case you run n cloudflared instances. I opted to have all my services catered by a single tunnel as there is no high availability (HA) since all of the tunnels will be running on the same VM. Any traffic hitting my subdomain, say service.adyanth.site, will be responded to by Cloudflare with its IP. This IP will be of a reverse proxy on the Cloudflare network where the daemon is connected. A setup like this provides a three-fold advantage:
- The first one is that my public IP would not be exposed to the internet, keeping me safe.
- Second, I have no ports open, meaning I do not need perimeter firewalls for protection.
- Third, I can utilize the excellent DDoS protection and other security measures that Cloudflare implements for my network.
With a bit of configuration, my Gitea instance works over SSH as well! You can refer to my previous post for all the configuration examples. The Cloudflare tunnel configuration file is here , and the ssh config file needed for remote access is here .
The second product, which blows my mind when thinking of feasibility for providing this service free of cost, albeit with a limit of 50 users, is Cloudflare for Teams . It is a part of their SASE framework with Zero Trust , which provides cloud-delivered security to all kinds of hybrid workloads. It constitutes of multiple offerings, Cloudflare Gateway and Cloudflare Access .
Gateway is a DNS-based filtering and network security service, similar to Cisco’s Umbrella . I do not use this extensively since I have Pi-Hole deployed on my LAN, which has all my custom block-lists implemented. The upstream DNS resolver for Pi-Hole is the cloudflared container which, in turn, points to my Gateway endpoint, providing protection and filtering on multiple levels.
More info here
After being done with Argo Tunnel, anyone could have accessed my applications. The only protection I had would be of the applications themselves, which I would not put my money on to be the very best.
Access is where things get interesting. It is what provides the “Zero Trust” out of the two. I can define my self-hosted applications, create authentication rules to say who has access to what resource, or rather the subdomains. I can spell this out as granularly as I want, specifying the email IDs of people to whom I would allow access. On top of this, I can indicate my Identity Providers (IdP) too, either tying into Google Sign-in, Github, or something similar or going the other way by creating and using my own IdP such as using Auth0 which integrates using OpenID Connect(OIDC).

With all this in place, all my hosted applications are available from anywhere in the world. More importantly, in a secure way, to the people to whom I grant access. But for the keen among you, you would have noticed I still have not addressed the issue with multiple ISPs and achieving HA for that. I do this by creating another tiny Ubuntu VM whose only job is to host cloudflared and Tailscale services (more on Tailscale in the next post). The cloudflared uses an identical configuration serving the same tunnel. You can, for example, have this point to a different tunnel and create load balancing rules on Cloudflare, but load balancing is a paid option; moreover, I am happy for now with the HA this provides.
Then, using policy-based routing in OpenWRT, I have one ISP serving the primary Ubuntu VM with all the applications, including one instance of cloudflared and the second ISP pointing to the tiny VM with cloudflared. In this way, if one ISP is having an issue, the other ISP through the other VM will keep my tunnels up, giving me the highest uptime I can get with what I have!